Glute Activation 101: Build Stronger Hips with Ankle Resistance Bands
Underactive glutes can throw off knee tracking, strain your lower back, and leave performance on the table. A simple ankle resistance band routine can “wake up” your glute medius and minimus, improve hip stability, and make your squats, runs, and everyday movement feel smoother and stronger.
Comfortable, adjustable cuffs stay put so you can focus on form. Multiple resistance levels let you progress safely.
Get the Ankle Resistance Bands4.93/5 rating • 214+ reviews • Lightweight and portable
$26.97
$15.98
4.93 out of 5 stars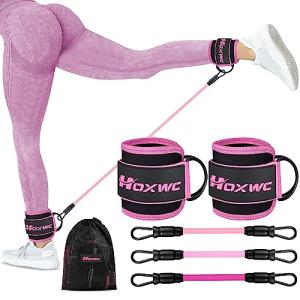
Ankle Resistance Bands for Hip and Leg Workouts
Boost your strength and flexibility with these versatile bands designed for effective leg and hip training
Product information
Product Review Score
Product links
Why Glute Activation Matters
Your glute medius and minimus stabilize the pelvis in single-leg stance and guide proper knee alignment. When they’re “asleep,” other tissues compensate—often the TFL, hip flexors, or lower back. Activation drills with ankle resistance bands provide targeted, low-impact tension at the right angles to prime these muscles before training or running.
- Better knee tracking: Reduces valgus collapse (knees caving in).
- Improved hip stability: Enhances balance and single-leg control.
- Stronger lifts and faster runs: Primed glutes transfer power more efficiently.
- Lower injury risk: Balanced hips can ease stress on knees and low back.
How to Fit the Band and Dial In Resistance
- Band height: Fasten cuffs just above the ankle bones; keep tension even left/right.
- Start light: Choose a resistance that lets you feel the glutes without shifting through the low back or TFL.
- Tempo: Use a 3–1–1 tempo (3s lower, 1s pause, 1s up) to build control.
- Breathing: Exhale on effort, keep ribs stacked over pelvis.
8-Exercise Glute Activation Flow (5–10 minutes)
Perform 1–2 sets of each exercise. Aim for controlled reps with clean alignment. Rest 20–30 seconds between moves.

1) Standing Hip Abduction
- Sets/Reps: 1–2 x 12–15/side
- Cues: Tall posture, toes forward, move from the hip; don’t lean.
- Common Mistake: Turning toes out—keeps tension off the glute med.
2) Standing Hip Extension (Kickback)
- Sets/Reps: 1–2 x 12–15/side
- Cues: Micro-bend in stance knee, squeeze glute—not low back.
- Common Mistake: Overarching through the lumbar spine.
3) Lateral Band Walks
- Sets/Reps: 1–2 x 8–10 steps each direction
- Cues: Hips level, toes forward, keep constant band tension.
- Common Mistake: Rocking side-to-side or letting knees cave.
4) Fire Hydrants
- Sets/Reps: 1–2 x 10–12/side
- Cues: Brace light, lift knee out keeping pelvis steady.
- Common Mistake: Twisting hips to “cheat” range.
5) Banded Clamshells
- Sets/Reps: 1–2 x 12–15/side
- Cues: Heels together, open from the hip, pause at top.
- Common Mistake: Rolling the pelvis backward.
6) Standing Hamstring Curl (Hip Stability)
- Sets/Reps: 1–2 x 10–12/side
- Cues: Stay tall; band tries to pull knee forward—glutes stabilize.
- Common Mistake: Letting knee drift; keep it beneath the hip.
7) Monster Walks (45° Out)
- Sets/Reps: 1–2 x 8–10 steps forward/back
- Cues: Slight hinge, ribs down, controlled steps.
- Common Mistake: Feet turning out excessively.
8) Isometric Abduction Hold
- Sets/Reps: 1–2 x 20–30s/side
- Cues: Press out gently against the band; don’t shrug.
- Common Mistake: Holding breath; breathe steady.
Ankle cuffs that don’t slip make activation work more effective.
Shop Ankle Resistance BandsQuick Warm-Up Flows
Pre-Run (5–7 minutes)
- Standing Hip Abduction – 1 x 12/side
- Lateral Band Walks – 1 x 8 steps each way
- Fire Hydrants – 1 x 10/side
- Isometric Abduction Hold – 1 x 20s/side
Pre-Lift (Glute-Focused, 6–8 minutes)
- Standing Hip Extension – 1 x 12/side (3–1–1 tempo)
- Clamshells – 1 x 12/side with 1s pause
- Monster Walks – 1 x 8 steps forward/back
- Lateral Band Walks – 1 x 8 steps each way
Troubleshooting Common Mistakes
- Knees caving in: Think “press the floor apart” and keep toes forward.
- Low-back pinch: Reduce resistance; exhale and keep ribs stacked.
- Hip hiking/leaning: Slow down, shorten range, and maintain level pelvis.
- Band slipping: Use adjustable ankle cuffs and tighten to a snug, comfortable fit.
Progression: From Activation to Strength
Once you groove clean reps, add one variable at a time:
- Volume: Add 2–4 reps per set.
- Tempo: Extend the eccentric to 4 seconds.
- Resistance: Move from light to medium, then heavy bands.
- Complexity: Introduce single-leg hinges, step-downs, or band-resisted split squats.
Comfortable, durable cuffs with multiple resistance options help you progress without fuss.
Ankle Resistance Bands for Hip and Leg Workouts
Boost your strength and flexibility with these versatile bands designed for effective leg and hip training
Product information
$26.97 $15.98
Product Review Score
4.93 out of 5 stars
214 reviewsProduct links
Light for activation • Medium for stability sets • Heavy for advanced strength work